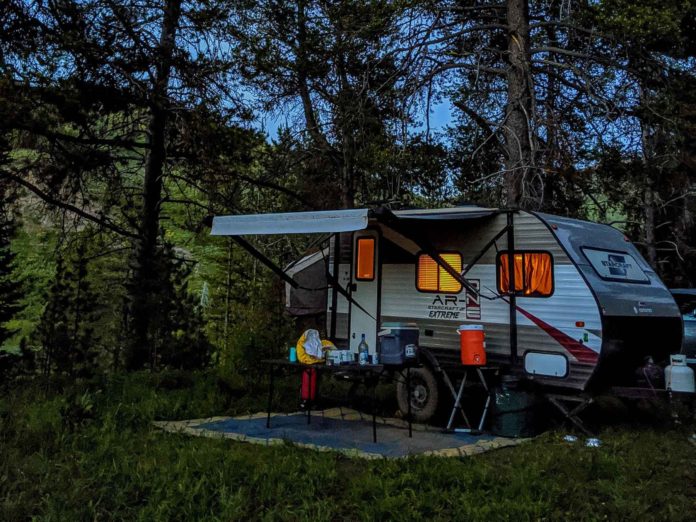
Six years ago, I bought a small camper — a hard-sided 15-footer with a “hybrid” pullout that made it just about right for one or two people who wanted a few creature comforts but didn’t need the overall “glamping” accoutrement to enjoy time in the woods.
Basically, those comforts consisted of indoor plumbing — a quick daily shower and the ability to enjoy the morning constitutional without digging a cat hole and enduring a swarm of mosquitos bearing down on my naked rear end.
This spring, now a part of a team that includes my girlfriend and our two dogs, it became increasingly clear that indoor plumbing isn’t all I needed. “I” is now “we,” and we’re planning to be a bit more ambitious with our RV treks.
First and foremost, we still needed something that met our basic needs — a vehicle we can tow into the mountains, park close to our favorite fishing destinations and spend time enjoying our public lands. But we also discovered that we needed something with more of those creature comforts for long, more involved trips — a vehicle that might, in the coming months, make a cross-country trek and plug into RV hookups on the way to various angling destinations. And two people and two dogs … that means something bigger. And, for you RV owners out there, that means something that requires a bit more maintenance.
And we went big. Uncomfortably so. It’ll mean slower, more deliberate trips to the hills, taking care to choose our destinations — and when we choose to visit them —with care. But it’ll mean, too, that we’ll have some flexibility to visit far-flung friends and family and, when the weather is crappy here, we can go places where the sun is shining and the fish are biting. Working remotely in the age of COVID has its benefits, and that includes occasionally changing the view from the home office to a lagoon-side camping spot where the redfish are tailing.
But one thing doesn’t change. RV maintenance and upkeep is no joke, particularly given the amount of money folks put into them. While it’s a given that they won’t hold their value for long, it’s also a given that the big investments in them mean it’s important to make sure the little things are handled. We’re lucky this year — our new camper (aka, the Taj Mahal on wheels) is brand new, and the vast majority of the maintenance tasks have been handled by the factory. But for those getting their RVs ready for the coming season, here are a few things you ought to consider:
- When was the last time you had your bearings repacked and serviced? With my old camper, I did this about every other season. The maintenance guide for the new RV recommends that I have the bearing serviced after 2,000 miles. For close-to-home camping, that’s a simple task, but if you plan a longer adventure, you may want to consider this more frequently. If you’re handy, it’s a task you can do with the help of a YouTube video. But if you’ve never done it, I’d recommend you leave it to the pros. It’ll cost a bit money, but it’ll be done right.
- The rubberized gas lines take a beating in the summer sun, and they can crack and eventually leak. Cover them in the winter, if possible, and make sure they’re still supple and doing their jobs before you head out on your first adventure of the season.
- How are your tires? They may have great tread left, but have they been sitting in the sun for a season or two? Check for cracks and wear before you head out. Cover your tires when possible, even it means just leaning something against them to shield them from the sun.
- Double check your sewer hose so you don’t have any disgusting messes at the RV dump after your first boondocking (dry camping) trip.
- Do a complete water system flush and then fill up your water tank, with all valves open, about two-thirds of the way with good, clean water. Add the appropriate amount of water conditioner (this will depend on the size of your water tank — it should take about a quart for every 25 gallons), and then take a drive around the neighborhood to agitate the tank and get the conditioner moving through the system. Then, visit the nearest RV dump and flush your treated water through the whole system. Rinse it out well, and then refill. This may seem like a lot of work, but it’s worth it. Once you get a bad taste or smell in your RV’s fresh water tank, it’s tough to get rid of it. It’s also not a bad idea to do the same thing for the sewer tank with RV sewer treatment tablets or fluid and fresh water before heading out the first time.
- Ideally, you’ve drained it over the winter (if you haven’t, and the tank froze … well, that’s not good). Newer and larger water heaters have a drain plug that includes a magnesium anode that attracts minerals and metals found in tap water and protects both the water heater and, as hot water flows through lines and pipes, the RVs entire water system. The anode, after just a few uses, will be one of the more disgusting things you’ll ever lay eyes on, as it literally builds up with all sorts of minerals and metals. Clean it off as best you can after every use, and drain your water heater after every use, too. Change the anode out every season. If you use your camper a lot, change it every four or five trips. Also, if you’ve winterized your camper, make sure you flush the winterizing fluid through your system before you open the valves to the water heater and let water flow through it. Nothing — and I mean nothing — smells as bad as winterizing fluid heated up by a propane water heater. Check to make sure the pilot lights when you turn the heater on (and don’t turn it on without water in it!). If your water heater does double duty (gas and electric), make sure the water heats when the RV is plugged in.
- Make sure your electric awnings and slide-outs are working before you haul the RV to your destination.
- Make sure the refrigerator works on both gas and electric settings. Make sure your heater, AC and thermostat are all working appropriately.
- When you flush water through the vehicle check for any leaks under the camper and under the sinks inside the coach, and the connections with any outside water connections (outdoor showers, outdoor kitchens, etc.). Get up on the roof before every season and check for cracks and potential leaks in the seams. Sometimes, a little silicon is all you’ll need to seal a potential leak, but sometimes it’s best to take the RV for a full roof inspection if you see potential leaks. Pay special attention to the seams around the AC, the TV antenna and any vents in the coach.
Bearings
Check your propane connections
Tires
Sewer Hose
Flush Your Water System
Check your water heater
Awnings and slideouts
Appliance Check
Leak Inspection
Every year, I have those regretful thoughts about buying an RV and then having to do the basic maintenance — it can be a lot of work, honestly. And it can be expensive, too, particularly after a few years of service and every pothole and road mile has accumulated into a problem that can’t either be ignored or quickly fixed.
But every year, I look forward to towing the camper to the river or to my favorite early season carp haunt and having a comfortable and clean home base with the creature comforts that make my fishing even more enjoyable.
The best advice, if you’re questioning the wisdom of an RV purchase? Consider the maintenance a necessary evil in the quest to enjoy your time even more on the water or with those you love. For me, buying that little camper all those years ago was the best purchase I ever made. The jury’s out on the new behemoth that rests menacingly on the pad at the side of the house, but I know those who go with me will appreciate the space and the comfort it will provide.
Truth be told, I bet I will, too.
Credit: Source link


