Every winter I look forward to prepping for the upcoming fly fishing season. I like to set the stage for a successful season with gear maintenance and preparation. For me, organization is the key to an enjoyable time on the water. There are those who can excel in a chaotic and disorganized environment, but unfortunately, I’m not one of them. The only way I can reduce my anxiety and increase my enjoyment on the water is to maintain some level of fly gear organization.
In truth, only within the last few years have I become efficient at this. Best practices for preparation, organization and gear maintenance are largely a matter of personal preferences developed over many years of trial and error. Here are a few things that work for me—thoughts and concepts that I use to prepare for each new season and stay organized. Hopefully, they’ll work for you, too.
Check your fly lines for cracks
The first thing I like to do is to run my hand up and down my fly lines to locate cracks or areas where the line’s coating is ripped or torn. If not repaired, these cracks will become larger and affect the castability of the line. The easiest way to repair crack or other damage to your fly line’s coating is to fill voids using a super glue gel or a medium texture UV resin. Make sure to smooth out the glue or resin to avoid creating a bump.
Clean your fly lines
I’m always surprised to learn how few anglers conduct regular maintenance on their line, which cost anywhere from $50-$150. Failure to clean your lines regularly will shorten their lifespan and increase the chance that you’ll have to pony up for a new line this season. Years ago, my father had the pleasure of fishing with Leon Chandler—a true gentleman who ran the Cortland Line Company for years. My father was surprised to see Leon was using a 5-year-old fly line during their trip. Leon mentioned he cleaned every one of his fly lines after each outing.
Any dirt or sediment left on your fly line can slowly abrade not only the fly line but also your rod’s stripping guides. All it takes to increase the life of your lines is take a few minutes cleaning your fly line with mild, soapy detergent after every trip. Not only will it increase the life of your line but also its performance (e.g. slickness and shoot-ability) during your next trip to the water.
Label your fly lines
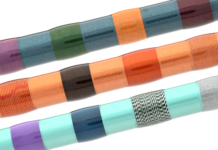
Most fly lines today are labeled with laser printing. However, these labels tend to fade after a short time. If you fish with multiple lines, it’s easy to forget or confuse which line is which. A great tip which came from my mentor, Joe Humphreys, is to place individual bands (a 5-weight line gets 5 distinct bands, for instance) near the tip of the fly line with a permanent marker. I use black with most floating and intermediate fly lines and a metallic grey marker with darker colored sinking lines. If you carry multiple tapers of the same line weight, then you can adjust the width of each band to indicate both line weight and taper type.
Another added benefit of placing black bands towards the front end of your fly line is increased visibility when fishing through glare. It’s easier to see black strike indicators when glare is present, and the same is true for a fly line laying on the water.
Build a “Blow Out” Kit
There’s a wise saying that’s attributed to the Navy SEALs: Two is one. One is none.
The take home point here is that it’s crucial to have a backup of certain fly fishing essentials. Fly fishing accessories are small and easily lost. Every angler differs with the tools they use, so it’s important to identify the handful of items you couldn’t live without and carry a backup of each with you on the water, or at the very least in your vehicle if that keeps it reasonably within reach.
My favorite “blow out” kit container is a clear Orvis Silver Sonic Waterproof Pocket, which I stock with 2 spools of tippet, a few strike indicators, sighter material, mitten clamps, a standard trout leader, fly floatant, and a small container of split shot. Your blow out kit doesn’t need to be extensive, it just needs to contain enough to keep a lost or broken piece of gear from putting an end to your fishing day.
Put contact information on all your fly boxes
Each year I find several well stocked fly boxes either floating in the water or laying near a streamside trail. Surprisingly, I’ve never found a fly box with any contact information. A fully stocked fly box is a large investment in either time, money, or both—so why not take a few moments of time to place your contact information on each of your fly boxes? I also put identifying information on almost all my equipment to increase the chances of being reunited with lost items. In my experience, most fly fishers are honest and will be quick to call after discovering lost gear.
Use a tether to ensure you don’t lose your box
It’s easy to forget to zip a pocket or to drop a fly box when your hands are wet. This tip, which aims to prevent those aforementioned lost boxes, comes from my friend and former Fly Fishing Team USA competitor, Loren Williams. Loren would use heavy monofilament or old fly line and tether his large working fly box to his pack or vest. My working box is a C&F Chest Patch, and I use 15lb backing to create loops on either side of the box. Then, I use mini snap clamps to connect the box to my waders or pack. The key is having a tethered system that can easily detach when needed.
Carry a fly patch
Always carry a patch to place all your used flies on. For years, I’d toss any of my used patterns back into my fly boxes, immediately after each use. Many of these flies would rust, cause other flies to rust. Sometimes, the fly’s colors would bleed out onto other patterns in the box (this is especially true with streamer patterns).
I keep it simple. I use Velcro to attach a piece of yoga mat to my working box. If given the option, I place the darker side of the mat material facing out so it collects more heat and increases dry times. At the end of the day, I detach the patch from my working box and place it on my vehicle’s dashboard to absorb more heat/light. Once dry, I take the flies off the patch and place them back into my box.
Purge your fly boxes
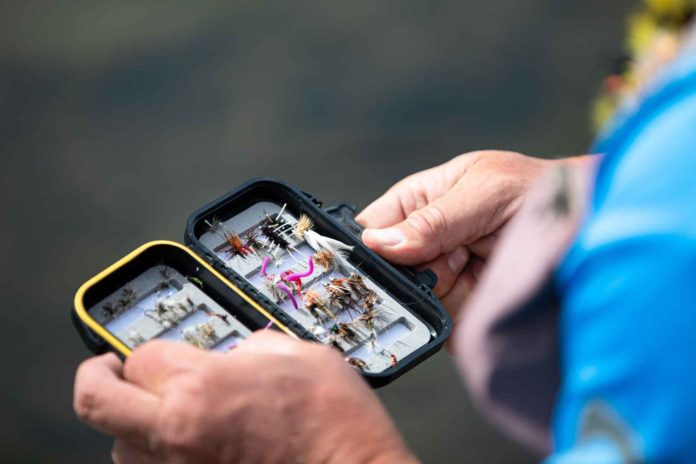
I’m always shocked to see how many unusable patterns find their way back into my fly boxes, week after week. Therefore, I’ve begun conducting a weekly fly box purge to insure my box contains only usable patterns that can be fished during the upcoming week. My goal is to carry patterns for the conditions I expect to fish within a 1-2 week timeframe. In the past, I can recall seeing sulphur patterns (a hatch occurring in May-early June) in my box while fishing in early October, or finding size 12 Adams in my box in January—both examples of having unusable patterns (for that time period) occupying space in my box.
Another tip I suggest is discarding any pattern from your box that you haven’t used in over a year. If you haven’t used it in a year—you’ll likely not be using this season, either. Regardless what fly box you carry, space is limited. You’ll be surprised how much space you’ll open up once you start disposing of patterns that haven’t touched the water in over a year.
Avoid paralysis by analysis. Having options is good, but too many options can create clutter and disorganization.
Stay organized out there.
Credit: Source link


